> ## Documentation Index
> Fetch the complete documentation index at: https://docs.prelaunch.online/llms.txt
> Use this file to discover all available pages before exploring further.
# Waitlist Feature
> Collect potential user emails and build a pre-launch user base
## Waitlist Feature Overview
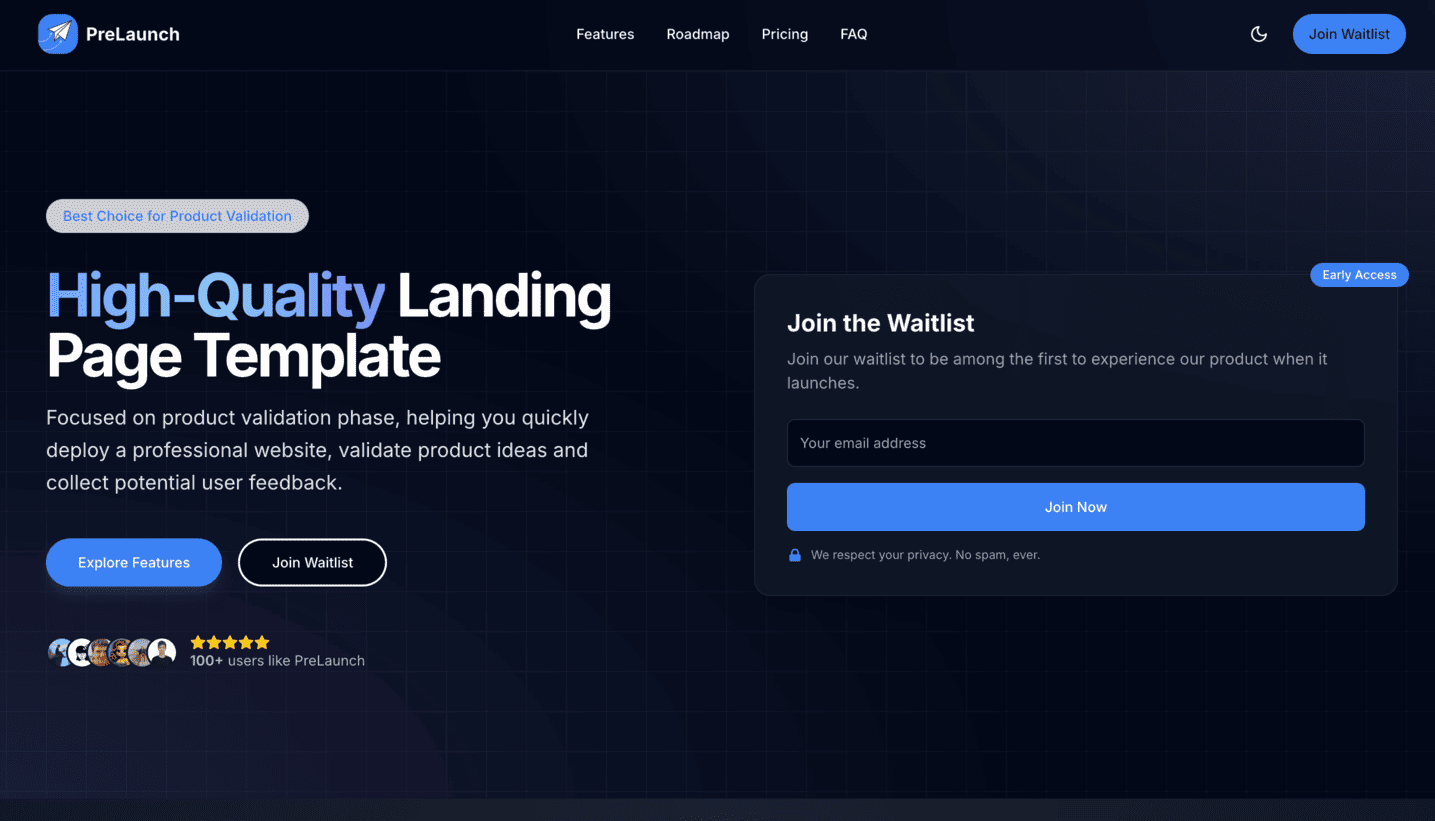
PreLaunch includes a powerful waitlist collection feature that helps you gather email addresses from potential users before your product officially launches, allowing you to build an initial user base. This feature offers:
* Clean, conversion-optimized form design
* Email confirmation notifications through Resend
* Prevention of duplicate submissions
* Integration with Supabase database
* Analytics tracking
* Customizable styles and messaging
## Implementation Methods
PreLaunch's waitlist functionality is implemented using the TypeformWaitlist component:
```tsx theme={null}
import TypeformWaitlist from '@/components/landing/TypeformWaitlist';
export default function HeroSection() {
return (
Your Product Name
Short product description
{/* Reference to waitlist section */}
{/* Waitlist component with ID for scrolling */}
);
}
```
## Configuring the Waitlist
### Basic Configuration
1. Ensure the necessary environment variables are set in your `.env.local` file:
```
# Supabase configuration
NEXT_PUBLIC_SUPABASE_URL=your-supabase-url-here
NEXT_PUBLIC_SUPABASE_ANON_KEY=your-supabase-anon-key-here
# Email sending (for confirmation emails)
RESEND_API_KEY=your_resend_api_key
RESEND_AUDIENCE_ID=your_resend_audience_id
```
### Customizing the Waitlist Form
You can customize the waitlist form by editing the `components/landing/TypeformWaitlist.tsx` component:
```tsx theme={null}
// Customize the component appearance
{/* Customize content */}
Join the Waitlist
{/* Customize description */}
Join our waitlist to be among the first to experience our product when it launches.
{/* Form implementation... */}
```
You can also customize the waitlist confirmation messages in the form component or in the translation files.
## Data Storage
User-submitted email addresses are stored in your Supabase database:
### Supabase Schema
The waitlist data is stored in a `waitlist` table with the following structure:
```sql theme={null}
create table if not exists
public.waitlist (
id uuid not null default uuid_generate_v4(),
email text not null unique,
locale text not null default 'en',
source text null,
created_at timestamp with time zone not null default now(),
constraint waitlist_pkey primary key (id)
);
```
## Backend Implementation
The waitlist feature uses a dedicated API endpoint for handling submissions:
```typescript theme={null}
// app/api/subscribe/route.ts
export async function POST(req: NextRequest) {
try {
const body = await req.json();
const { email } = body;
// Check if email already exists
const emailExists = await isEmailInWaitlist(email);
if (emailExists) {
return NextResponse.json(
{
success: true,
alreadyExists: true,
message: "Email already registered in waitlist"
}
);
}
// Add to Supabase waitlist
const result = await addToWaitlist({
email,
locale,
source: "website"
});
// Track signup for analytics
trackWaitlistSignup(email);
// Send confirmation email
await sendWaitlistConfirmationEmail({
email,
locale
});
// Return success response
return NextResponse.json({
success: true,
message: "Successfully joined the waitlist"
});
}
catch (error) {
// Handle errors
return NextResponse.json(
{ success: false, error: "Submission failed" },
{ status: 500 }
);
}
}
```
## User Confirmation Emails
PreLaunch sends confirmation emails after users register for the waitlist using Resend:
```typescript theme={null}
// libs/resend.ts
export const sendWaitlistConfirmationEmail = async ({
email,
locale = 'en',
}: {
email: string;
locale?: string;
}) => {
try {
// Render React component to HTML
const html = await renderAsync(
React.createElement(WaitlistConfirmationEmail, {
email,
locale,
})
);
// Send email with verified domain
const { data, error } = await resend.emails.send({
from: config.resend.fromNoReply,
to: email,
subject: `Welcome to PreLaunch Waitlist!`,
html,
replyTo: config.resend.fromAdmin,
});
return { success: true, data };
} catch (error) {
console.error("Failed to send waitlist confirmation email:", error);
return { error: true, message: "Failed to send email" };
}
};
```
The default email template is located in `components/emails/WaitlistConfirmationEmail.tsx` and can be customized as needed.
## Frequently Asked Questions
You can export user data through the Supabase Console, or use the `getWaitlistUsers` function provided in `libs/supabase/waitlist.ts` to create an admin API for data retrieval.
You can customize the styling by editing the `TypeformWaitlist.tsx` component, or by using Tailwind CSS classes to adjust the appearance.
Yes, you can customize the `TypeformWaitlist` component to include additional fields. You would also need to update the Supabase table schema and the API endpoint to handle the additional fields.
## Example Code
Here's a complete example of a waitlist landing page:
```tsx theme={null}
// app/page.tsx
import Hero from '@/components/landing/Hero';
import Features from '@/components/landing/Features';
import FAQ from '@/components/landing/FAQ';
import TypeformWaitlist from '@/components/landing/TypeformWaitlist';
export default function Home() {
return (
{/* You can also add the waitlist form in a dedicated section */}
);
}
```
## Related Links
Learn how to showcase your product roadmap
Allow users to vote for features
 ## Implementation Methods
PreLaunch's waitlist functionality is implemented using the TypeformWaitlist component:
```tsx theme={null}
import TypeformWaitlist from '@/components/landing/TypeformWaitlist';
export default function HeroSection() {
return (
## Implementation Methods
PreLaunch's waitlist functionality is implemented using the TypeformWaitlist component:
```tsx theme={null}
import TypeformWaitlist from '@/components/landing/TypeformWaitlist';
export default function HeroSection() {
return (